
How to Build a JAR File using a Maven Project in Eclipse
This tutorial details how to create a JAR File Using Maven in Eclipse. I.e. if you want to generate a JAR as the result of your Maven Install command then this tutorial is for you.The created JAR can be included as a dependency in a different project and becomes reusable.
Pre-requisite for this tutorial - The Eclipse plugin "Maven Integration for Eclipse (Juno and newer)" should be installed in your copy of Eclipse IDE.
Lets start off the with the tutorial then.
Step 1: In Eclipse Juno, click on File >New >Other and Select “Maven Project” and click “Next”...
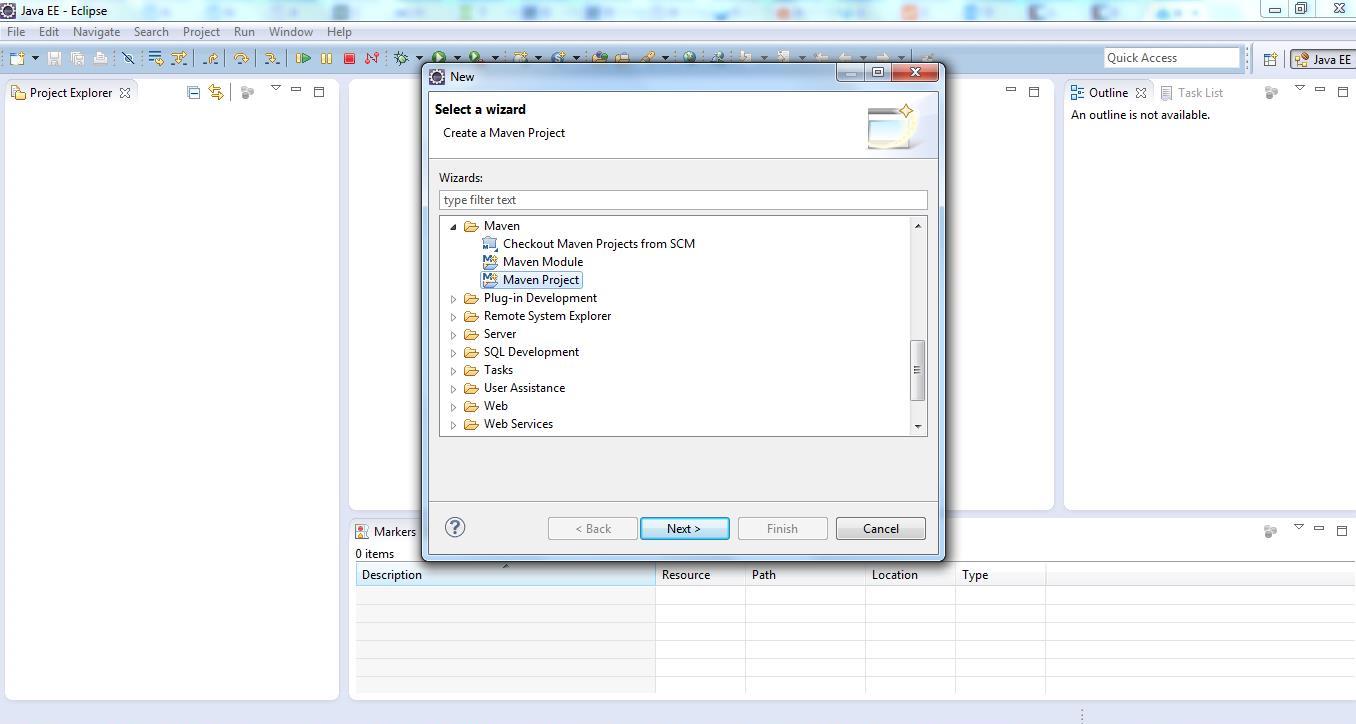 Maven JAR Project Step 1
Step 2:The following “New Maven Project” dialog will be displayed. If you want to store the project in the default workspace location then nothing needs to be done on this screen. Click “Next” to move to the next screen…
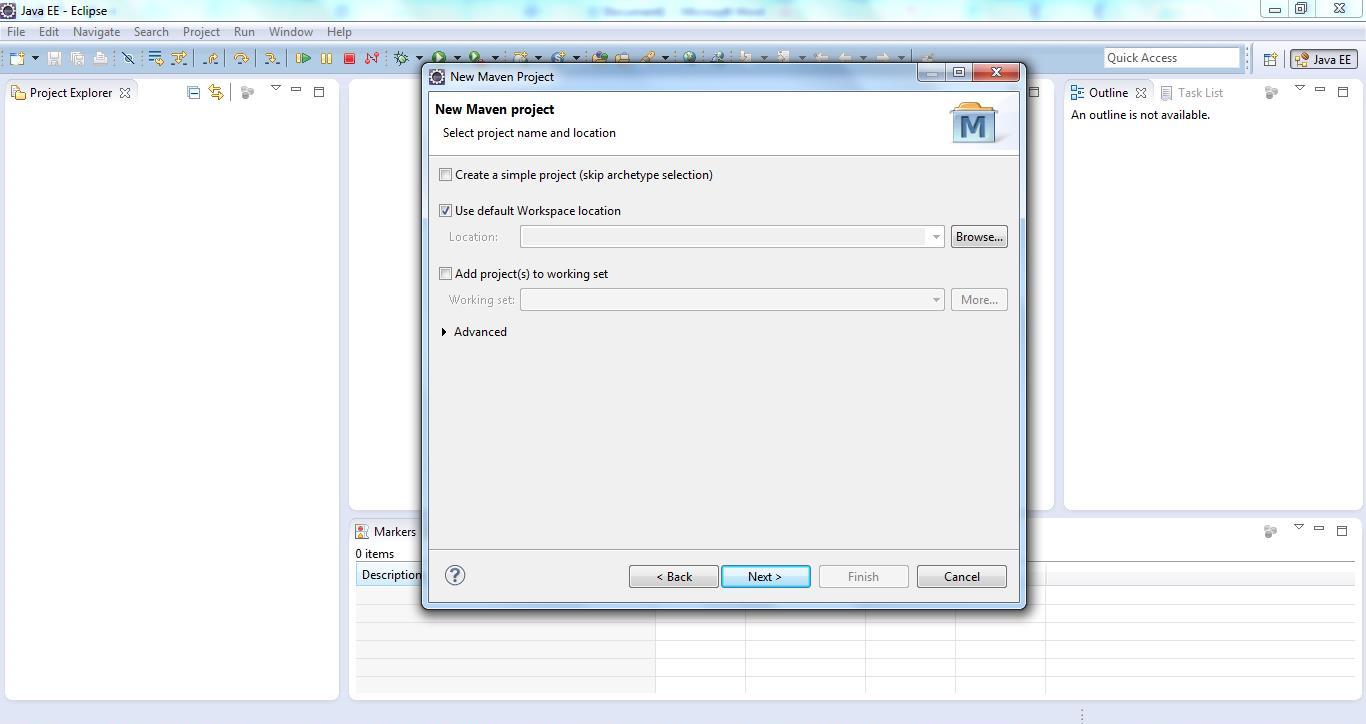 Maven JAR Project Step 2
Step 2A: In case you do not want to store your project in the Default Workspace location then you need to unselect the “Use Default Workspace” checkbox and click on “Browse”. You can select the folder to store your project in the “Selection Location” dialog box...
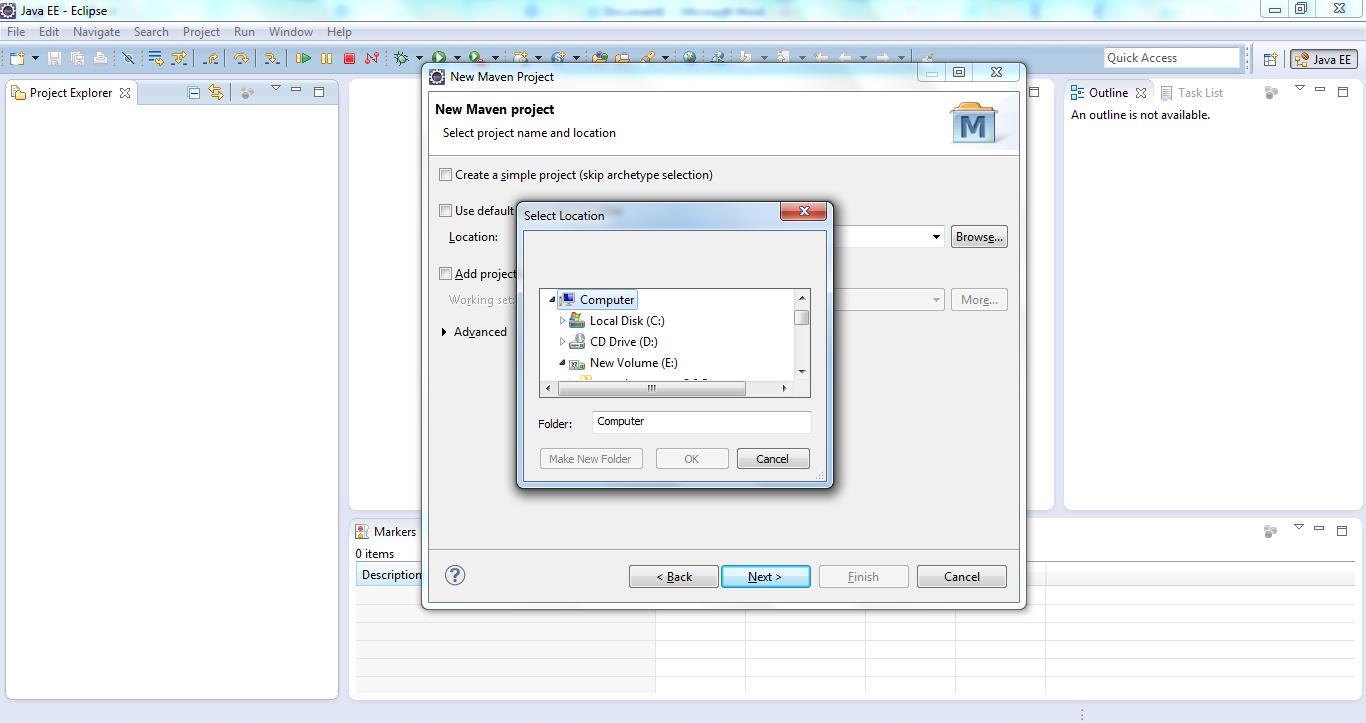 Maven JAR Project Step 2A
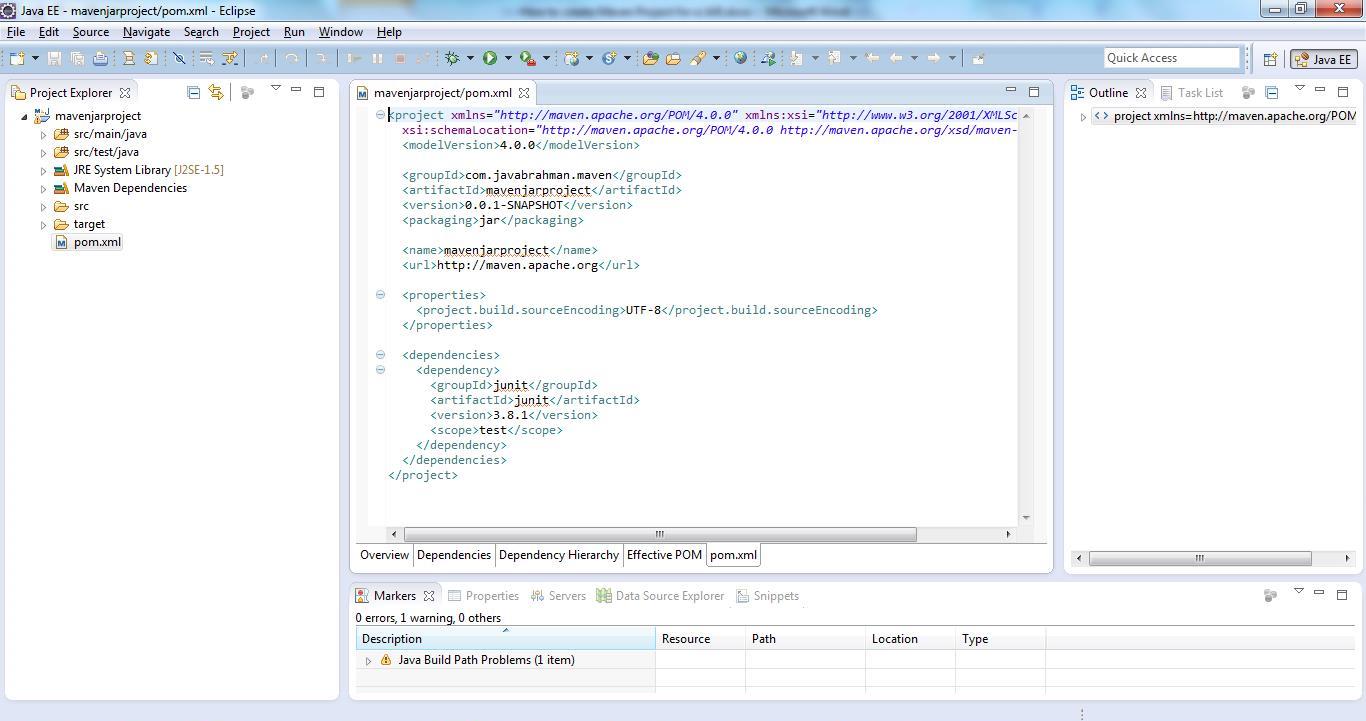
Step 3: Next the Archetype Selection dialog is displayed in the wizard. Select the “maven-quickstart-archetype”, which is the bare minimum archetype for creating a sample project, and which is exactly what we need for creating a JAR. It has the following structure - project |-- pom.xml `-- src |-- main | `-- java | `-- App.java `-- test `-- java `-- AppTest.java Note – Eclipse may download the latest version of the archetype before it takes you to the next screen. It will display a message at the bottom of the dialog if it does that...<br>
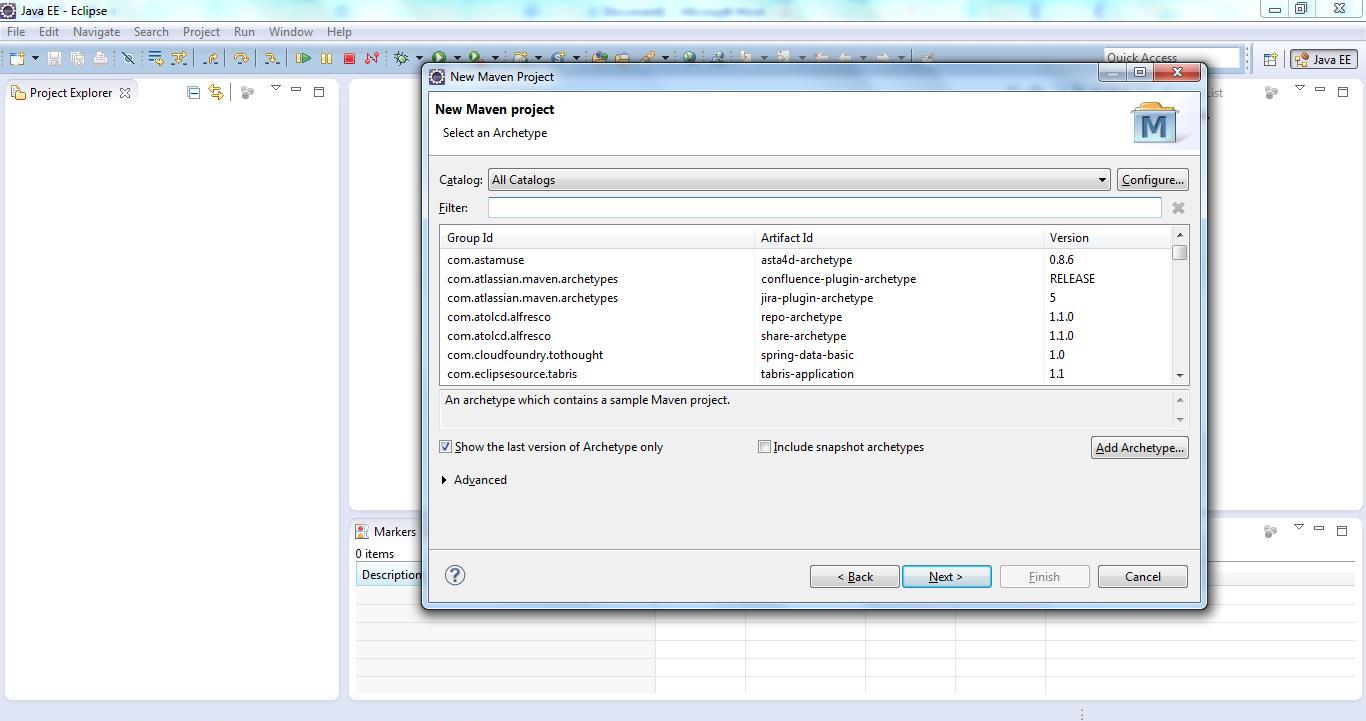 Maven JAR Project Step 3
Step 4: You will be shown a configuration dialog where you need to enter the “Group Id”,”Artifact Id”, “Version” and “Package” for your maven project...
Maven JAR Project Step 4
Step 5: Fill these up as shown below… (Note that the Package field is auto-populated as a concatenation of GroupId and Artifact Id. But you can edit it if you want to)
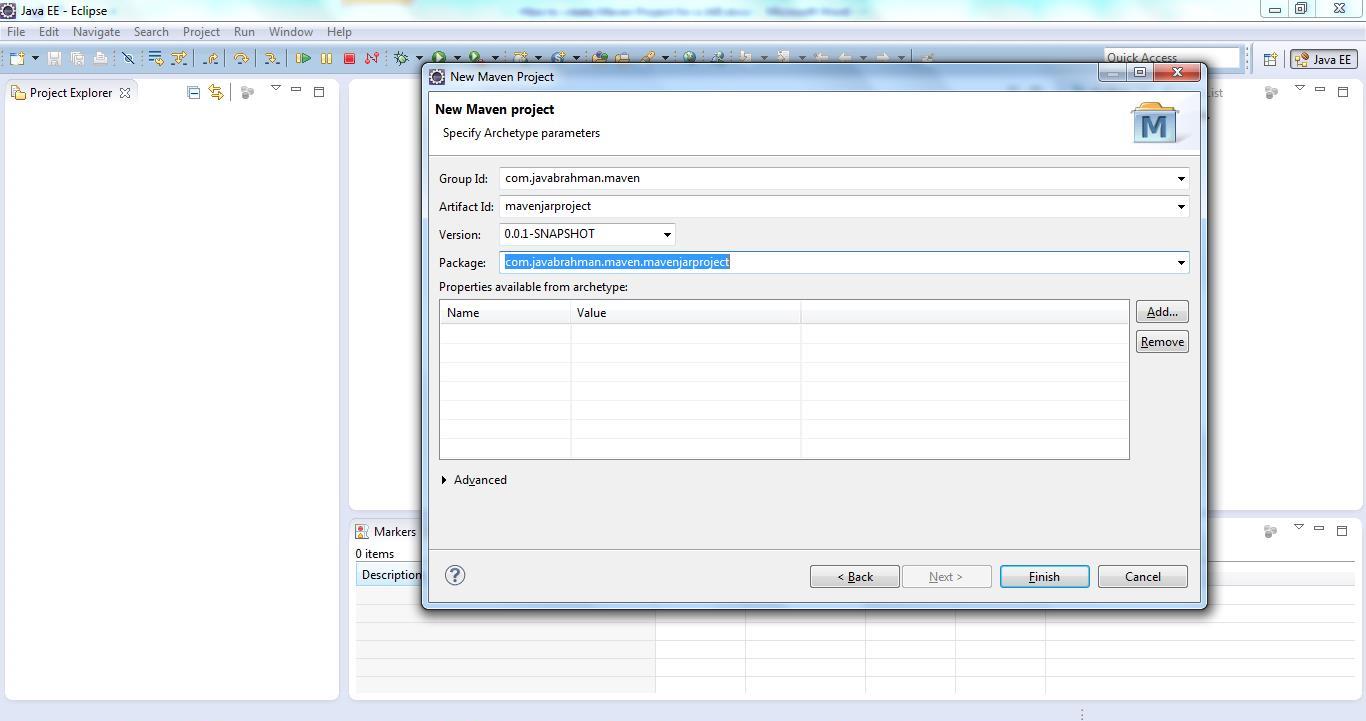 Maven JAR Project Step 5
Step 6: Click on “Finish” to finish generating your Maven project...
 Maven JAR Project Step 6
Pre-requisite for this tutorial - The Eclipse plugin "Maven Integration for Eclipse (Juno and newer)" should be installed in your copy of Eclipse IDE.
Lets start off the with the tutorial then.
Step 1: In Eclipse Juno, click on File >New >Other and Select “Maven Project” and click “Next”...
Maven JAR Project Step 1 Maven JAR Project Step 2Step 2A: In case you do not want to store your project in the Default Workspace location then you need to unselect the “Use Default Workspace” checkbox and click on “Browse”. You can select the folder to store your project in the “Selection Location” dialog box...
Maven JAR Project Step 2AStep 3: Next the Archetype Selection dialog is displayed in the wizard. Select the “maven-quickstart-archetype”, which is the bare minimum archetype for creating a sample project, and which is exactly what we need for creating a JAR. It has the following structure - project |-- pom.xml `-- src |-- main | `-- java | `-- App.java `-- test `-- java `-- AppTest.java Note – Eclipse may download the latest version of the archetype before it takes you to the next screen. It will display a message at the bottom of the dialog if it does that...<br>
Maven JAR Project Step 3Step 4: You will be shown a configuration dialog where you need to enter the “Group Id”,”Artifact Id”, “Version” and “Package” for your maven project...
Maven JAR Project Step 4 Maven JAR Project Step 5Step 6: Click on “Finish” to finish generating your Maven project...
Maven JAR Project Step 6